How to Enable Wallpaper Slideshow in Windows 10
Make sure to create a restore point just in case something goes wrong.
How to Enable Wallpaper Slideshow in Windows 10 Method 1: Disable or Enable Wallpaper Slideshow through Power Options Method 2: Disable or Enable Wallpaper Slideshow in Windows 10 Settings
Method 1: Disable or Enable Wallpaper Slideshow through Power Options
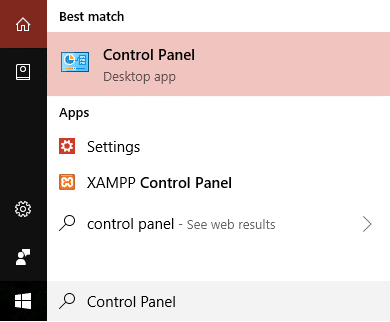
1.Navigate to control panel. You can type control panel in the Windows search box and open control panel.
2.From Control Panel choose Power options.
3.Click on “Change plan settings” option next to your current active power plan.
4.Now you need to tap on “Change advanced power settings” link which will open a new Window where you can get power options.
5.Click on the plus icon (+) next to Desktop background settings to expand then choose Slideshow.
6.Now click on the plus icon (+) next to the slideshow option to expand then either select “Paused or Available” the desktop background slideshow option on battery and plugged in the setting. 7.Here you need to make changes according to your preferences, if you want to keep your desktop background slideshow function, you should make it available instead of paused. On the other hand, if you want to make it disable keep it paused. If you want to enable it for battery or plugged in settings, you can customize the settings as per your requirements.
On battery – Paused to disable Slide Show On battery – Available to Enable Slide show Plugged in – Paused to disable Slide Show Plugged in – Available to Enable Slide Show
8.Click on OK to apply changes in your settings. Sign out and sign in back to check the settings of your changes. Your desktop background slideshows will be activated after rebooting your system.
Method 2: Disable or Enable Wallpaper Slideshow in Windows 10 Settings
You have another method to get this task done immediately with several other features. It means you can customize the timing and display features as well while enabling and disabling the slideshow function through this method. 1.Navigate to Windows 10 Settings. Use shortcut keys Windows key + I and choose personalization option from the settings.
2.Here you will see Background settings options on the right side panel. Here you need to select Slideshow option from Background drop-down.
3.Click on Browse option to choose the images that you want to show on your desktop background.
4.Choose the images from the folder. 5.You can choose the frequency of the slideshow features which will determine at what speed different images will be changed. Further, you can make more customization in the slideshow functioning of your device. You can choose a shuffle option and choose the slideshow activation on battery. Further, you can choose the display fit option where you get several sections to choose from. You can choose customized and personalized images to give your desktop more personalized options. Make your desktop more personalized and interactive. Above mentioned two methods will help you to customize the settings of background slideshow. It seems very simple but you need to first prioritize your preferences. It undoubtedly sucks battery hence whenever you are out of charging point, you need to save your battery by disabling this feature. Here you learn how to enable and disable this function whenever you want. You need to determine when you need to enable it and how to disable it when you need to save your battery for important things. Windows operating system is loaded with all features to make your user experience more interactive. However, you need to keep yourself updated with the latest features and tricks to update your Windows operating system functions. Recommended:
Fix Computer Won’t Go to Sleep Mode In Windows 10 How to Transfer Files from Android to PC 7 Ways to Quickly Turn Your Windows Screen Off 10 Ways to Free Up Hard Disk Space On Windows 10
I hope this article was helpful and you can now easily Enable Wallpaper Slideshow in Windows 10, but if you still have any questions regarding this tutorial then feel free to ask them in the comment’s section.


![]()


