Depending upon the system user’s may receive one of the following error messages:
How to Fix Failed to connect to Windows service
So without wasting any time let’s see resolve Failed to connect to Windows service error in Windows 10 with the help of the below-listed guide.
How to Fix Failed to connect to Windows service Method 1: Delete Windows Logs File Method 2: Use netsh winsock reset command Method 3: Fix the error using Registry Editor Method 4: Stop Windows Font Cache Service Method 5: Disable Fast Startup Method 6: Clean boot your system Method 7: Run CCleaner and Malwarebytes Method 8: Disable User Account Control Method 9: Run System File Checker (SFC) and Check Disk (CHKDSK) Method 10: Perform System Restore
Method 1: Delete Windows Logs File
Sometimes Windows log files are corrupted which causes the error “failed to connect to Windows service.” To fix the issue delete all the log files.
Navigate to the following folder:
Now make sure to rename the Logs folder to something else.
If you are unable to rename the folder then you have to stop Windows Event Logs Service.
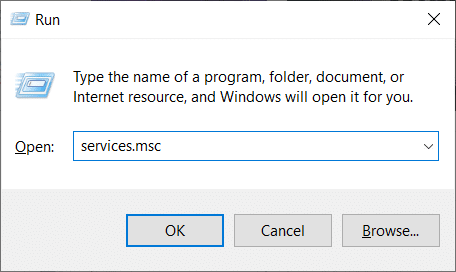
To do so press Windows Key + R then type services.msc and then find Windows Event Logs.
Right-click on Windows Event Logs Service and select Stop. Minimize the Services window do not close it.
Next try to rename the folder, if you are not able to rename then delete everything present inside the Logs folder. Note: If you find that you do not have access to all of the logs due to them being locked, you can try Unlocker Assistant, which will allow access to all the locked files and the ability to delete them.
Again open the Services window and start the Windows Event Logs Service.
Check if the problem is resolved or not.
Method 2: Use netsh winsock reset command
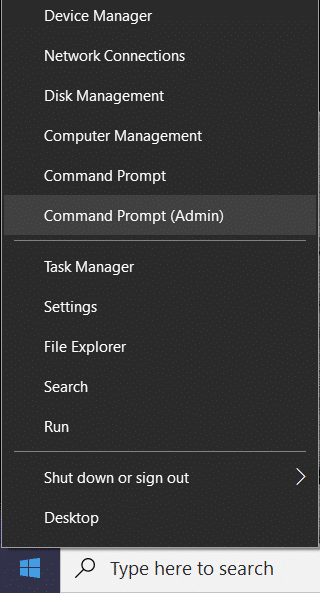
Press Windows Key + X then select Command Prompt (Admin).
Now type the following command in the cmd and hit enter:
Close the command prompt window then restart your PC and see if you were able to fix Failed to connect to Windows service issue. Also Read: Fix The L2TP Connection Attempt Failed Error on Windows 10
Method 3: Fix the error using Registry Editor
Press Windows Key + R then type “regedit” (without quotes) and hit enter to open Registry Editor.
Now navigate to the following key in the Registry Editor:
Next, find the value of imagepath key and check its data. In our case, its data is svchost.exe -k netsvcs.
This means the above data is in charge of the gpsvc service.
Now navigate to the following path in the Registry Editor:
In the right window pane, locate netsvcs and then double click on it.
Check the Value data field and make sure gpsvc is not missing. If it’s not there then add the gpsvc value and be very careful in doing so because you don’t want to delete anything else. Click Ok and close the dialog box.
Next, navigate to the following folder: Note: This is not the same key present under SvcHost, it’s present under the SvcHost folder in the left window pane)
If netsvcs folder is not present under the SvcHost folder then you need to manually create it. To do so, right-click on the SvcHost folder and select New > Key. Next, enter netsvcs as the name of the new key.
Select the netsvcs folder which you just created under SvcHost and in the left window pane then right-click and select New > DWORD (32-bit) value.
Now enter the name of the new DWORD as CoInitializeSecurityParam and double-click on it.
Set Value data to 1 and click OK to save changes.
Now similarly create the following three DWORD (32-bit) Value under netsvcs folder and enter the value data as specified below:
Click OK after setting the value of each of them and close the Registry Editor.
Method 4: Stop Windows Font Cache Service
Press Windows Key + R then type services.msc and hit enter.
In the Services window that opens, find Windows Font Cache Service and right-click on it then select Stop.
Now minimize the Services window as you are going to need it later and again press Windows Key + R then type %localappdata% and hit enter.
Next, locate the FontCache DAT files and delete them. For example, in my case the file name was GDIPFONTCACHEV1.
Again go back to Services window and right-click on Windows Font Cache Service then choose Start.
Restart your PC to save changes and this may help you Fix Failed to connect to Windows service issue, is not the continue.
Method 5: Disable Fast Startup
The fast startup combines features of both Cold or full shutdown and Hibernates. When you shut down your PC with a fast startup feature enabled, it closes all the programs and applications running on your PC and also logged out all the users. It acts as a freshly booted Windows. But Windows kernel is loaded and system session is running which alerts device drivers to prepare for hibernation i.e. saves all current applications and programs running on your PC before closing them. This can sometimes cause an issue with the programs which can lead to the “Failed to connect to Windows service error“. In order fix the issue you need to disable the Fast Startup feature which seems to be working for other users.
Method 6: Clean boot your system
Press Windows Key + R then type msconfig and hit enter to System Configuration.
On the General tab, choose Selective Startup and under it make sure the option “load startup items” is unchecked.
Navigate to the Services tab and checkmark the box that says “Hide all Microsoft services.“
Next, click Disable all of which would disable all the other remaining services.
Restart your PC check if the problem persists or not.
After you had finish troubleshooting make sure to undo the above steps in order to start your PC normally.
Method 7: Run CCleaner and Malwarebytes
Perform a Full antivirus scan to make sure your computer is secure. In addition to this run CCleaner and Malwarebytes Anti-malware.
Download and install CCleaner.
Double-click on the setup.exe to start the installation.
Click on the Install button to start the installation of CCleaner. Follow on-screen instructions to complete the installation.
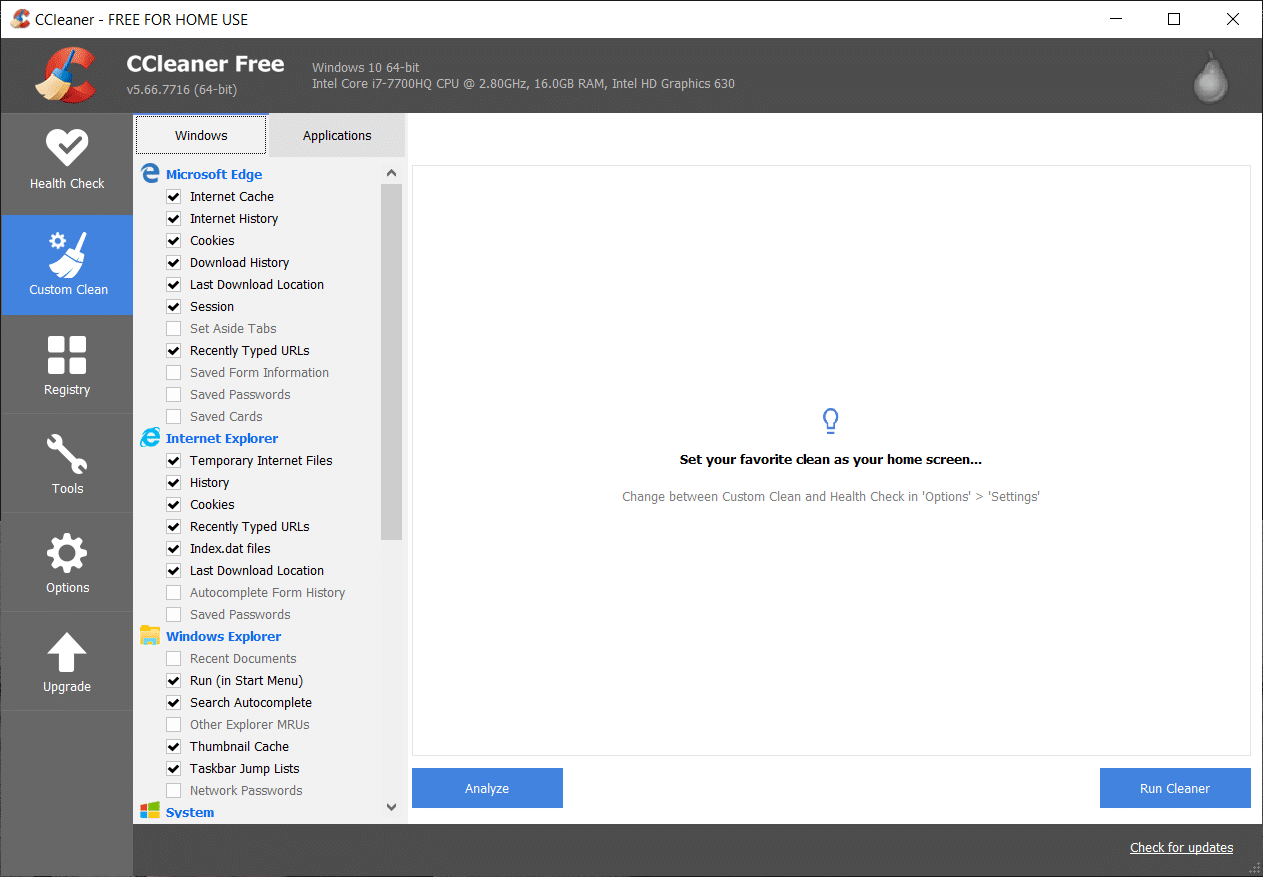
Launch the application and from the left-hand side menu, select Custom.
Now see if you need to checkmark anything other than the default settings. Once done, click on Analyze.
Once the analysis is complete, click on the “Run CCleaner” button.
Let CCleaner run its course and this will clear all cache and cookies on your system.
Now, to clean your system further, select the Registry tab, and ensure the following are checked.
Once done, click on the “Scan for Issues” button and allow CCleaner to scan.
CCleaner will show the current issues with Windows Registry, simply click on the Fix selected Issues button.
When CCleaner asks “Do you want backup changes to the registry?” select Yes.
Once your backup has completed, select Fix All Selected Issues.
Reboot your PC to save changes. If this doesn’t fix the issue then run Malwarebytes and let it scan your system for harmful files.
Method 8: Disable User Account Control
Type Control Panel in the Windows Search then click on the top of the search result.
Next, select User Accounts > User Accounts > Change User Account Control Settings.
Move the slider all the way down to Never notify.
Click Ok to save changes and reboot your system. The above method may help you fix failed to connect to Windows service error, if not, continue.
Method 9: Run System File Checker (SFC) and Check Disk (CHKDSK)
Press Windows Key + X then click on Command Prompt(Admin).
Now type the following in the cmd and hit enter: Sfc /scannow
Wait for the above process to finish and once done restart your PC.
Next, run CHKDSK which can fix bad sectors in your hard disk.
Let the above process complete and again reboot your PC to save changes.
Method 10: Perform System Restore
When none of the above methods works in resolving the error then System Restore can definitely help you in fixing this error. So without wasting any time run system restore in order to fix failed to connect to Windows service error.
That’s it you have successfully Fix Failed to connect to Windows service error but if you still have any queries regarding this article feel free to ask them in the comment’s section.


